


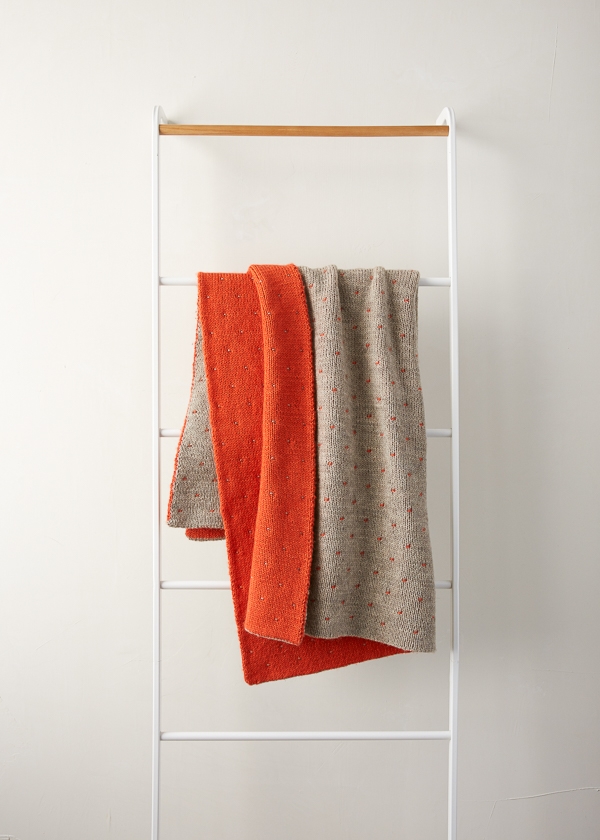
Double Knit Blanket
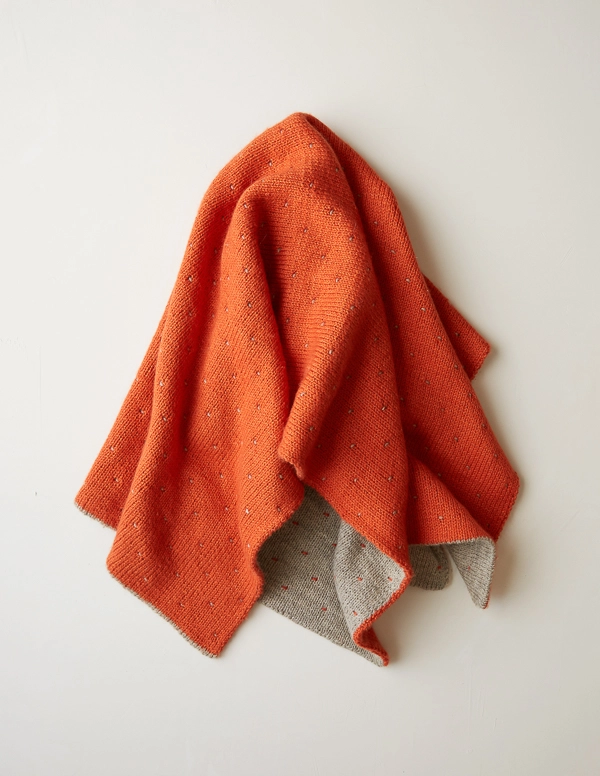
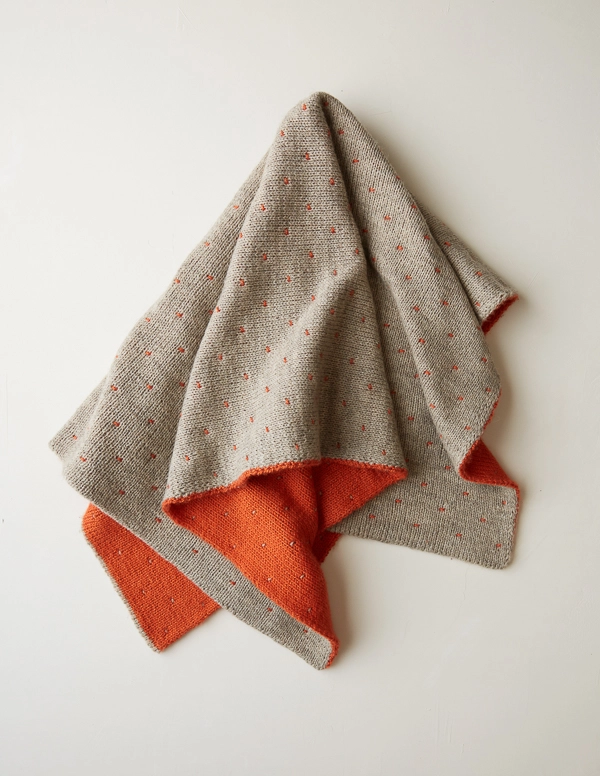
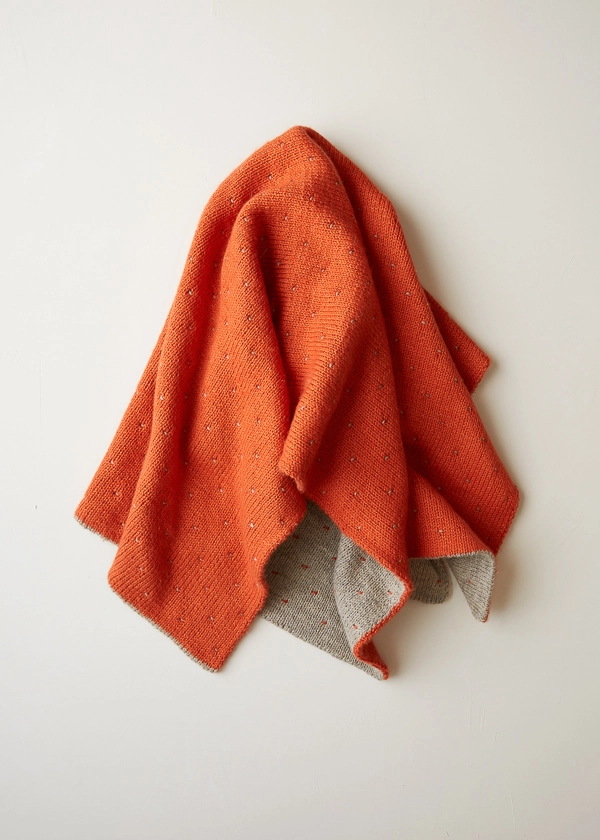
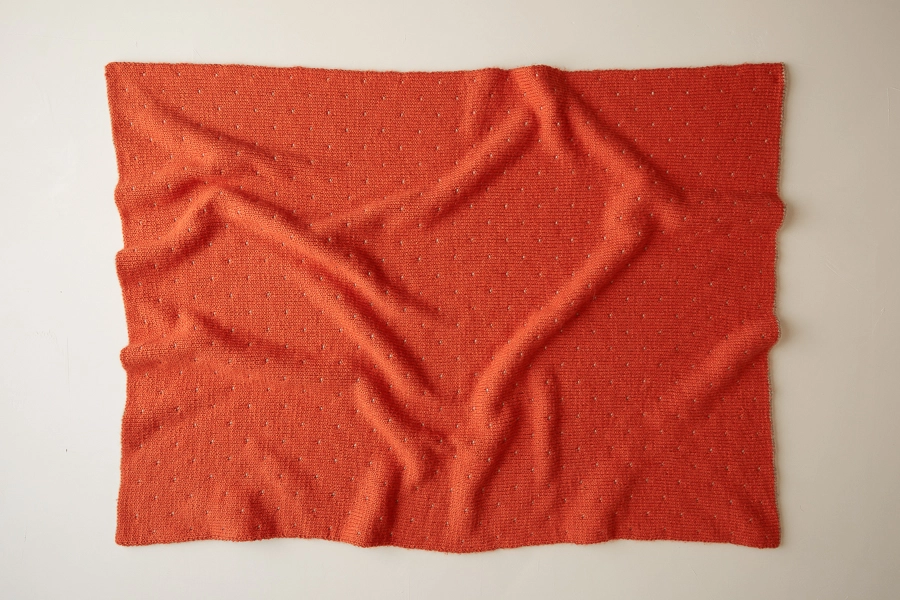
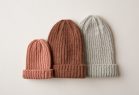
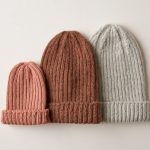
Our Double Knit Blanket is, indeed, double knit! Double knitting is a simple way to create two layers of stockinette fabric at once by slipping every other stitch as you alternate yarn colors each row. The result? One yarn on one side and another on the other… Needle magic!
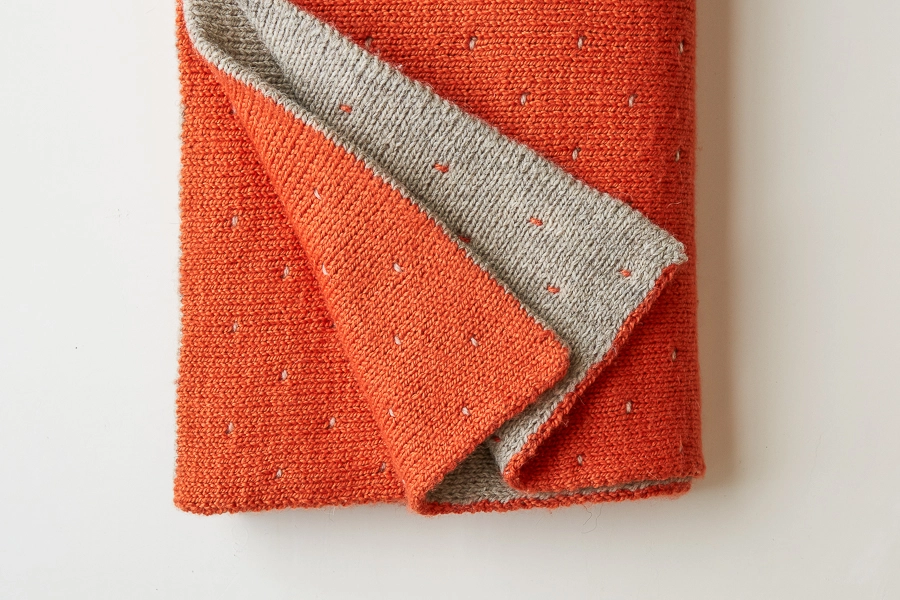
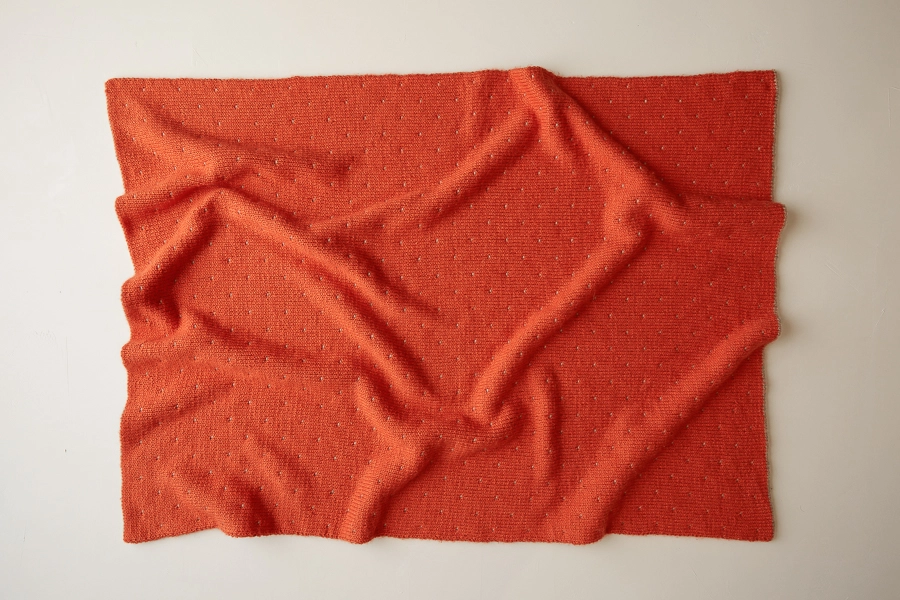
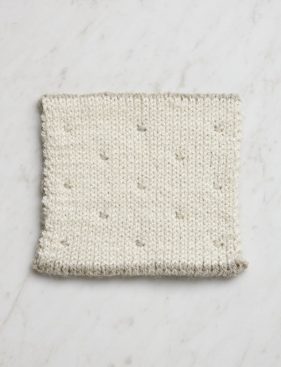
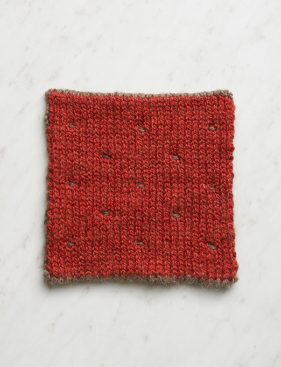
What’s more, we took a page from the quilting books and threw in tiny tacks (created while you knit!), critical little details that truly set this blanket apart.

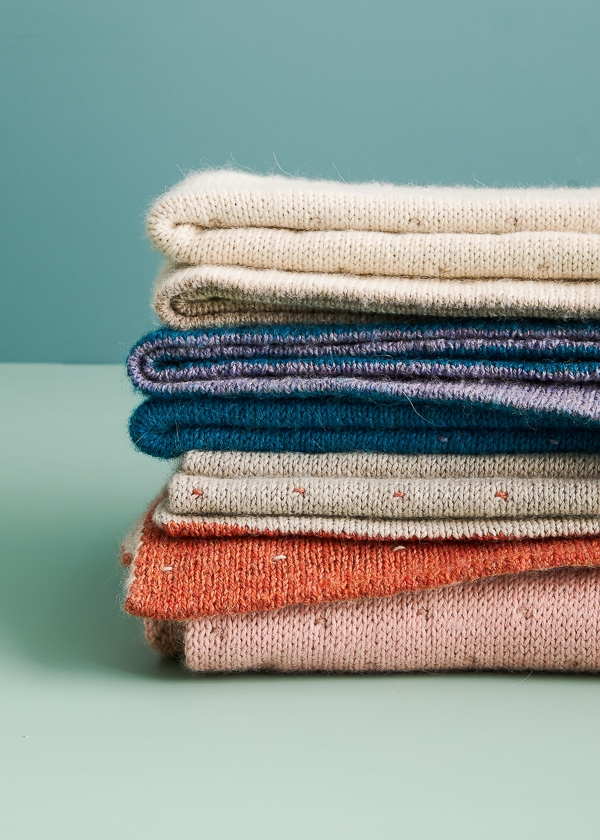
One of the opportunities our Double Knit Blanket gives us is to explore our favorite stew: the one where we throw rustic and refined into the very same pot. And so, one side is our undyed Good Wool, a straight-from-nature rugged beauty, while the other is our sumptuous Mulberry Merino with its subtle shine and smooth finish… Great flavors together!
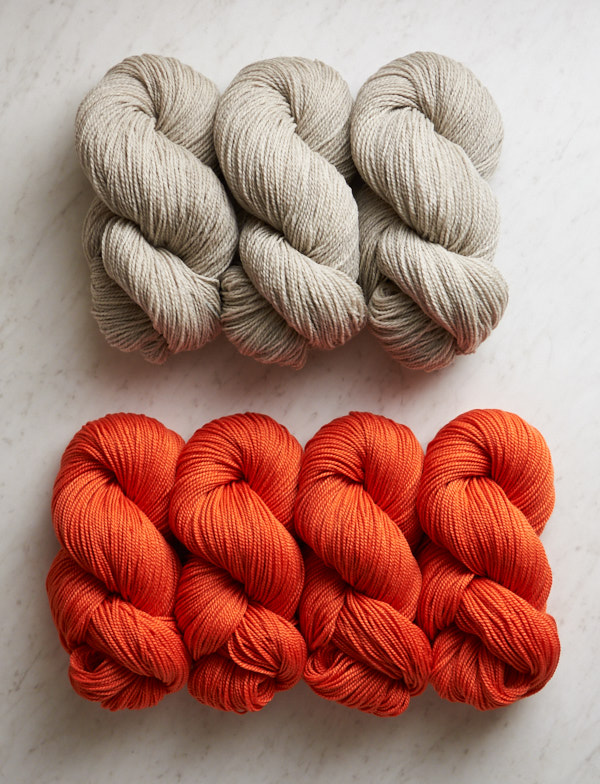
To make a baby-size blanket in these two yarns, you’ll just need one of our Double Knit Blanket Bundles. Each one includes Good Wool’s Driftwood Gray for one side, and then choose from four different Mulberry Merino colors for the other (this one is gorgeous Persimmon Orange). Want to make it a throw? We tell how many skeins and cast-on stitches to add!

Apart from its two-sided fun, our Double Knit Blanket’s two layers give it a seriously decadent drape and warmth… an heirloom knit for a new baby or an old friend or even yourself!

Update: New Colors
March 25, 2019
We love the original version of our Double Knit Blanket so much that we decided to update our Bundle options with the newest colors of Mulberry Merino! Our Double Knit Blanket Bundle is available in seven beautiful color combos!
UPDATE: NOW IN GOOD WOOL + SEASON ALPACA
MARCH 2024
Earthy Good Wool and smooth-as-honey Season Alpaca each bring their own very special touch to our Double Knit Blanket… You’ll love the satisfying feel of these yarns together! Pick from nine gorgeous Double Knit Blanket Bundles and enjoy the two-sided wonder that is double knitting!
Designed by Purl Soho designer, Jake Canton. Click here to see even more of Jake’s designs!
Share your progress and connect with the community by tagging your pics with #PurlSoho, #PurlSohoBusyHands, #PurlSohoDoubleKnitBlanket, and #PurlSohoGoodWool. We can’t wait to see what you make!
Materials
Please Note: Our Double Knit Blanket Bundles are no longer available. To build your own, you will need…
- Yarn A: 3 (5) skeins of Purl Soho’s Good Wool, 100% undyed Andean highland wool. Each skein is 383 yards/ 100 grams; approximately 966 (1788) yards required.
- Yarn B: 4 (7) skeins of Purl Soho’s Mulberry Merino, 80% extra fine merino wool and 20% mulberry silk. Each 218 yards/ 100 grams; approximately 957 (1526) yards required. (NOTE: We no longer offer Mulberry Merino, but choose from one of our other sport weight yarns.)
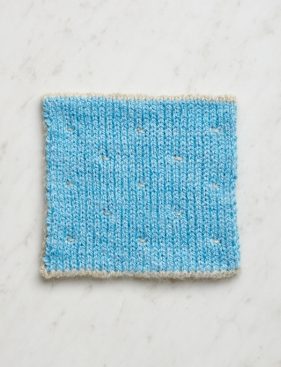
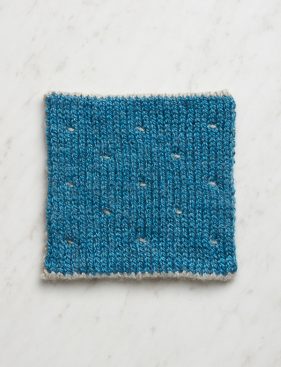
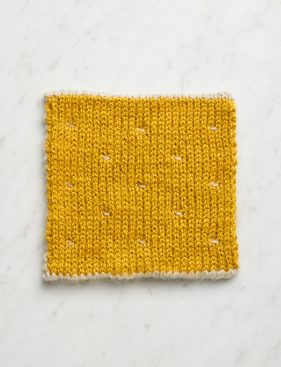
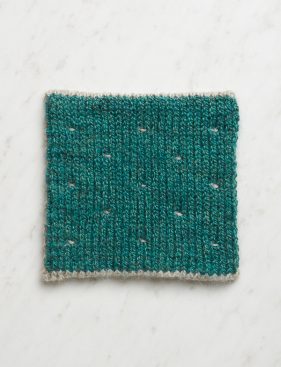
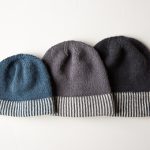
In addition to the Driftwood Gray + Persimmon Orange palette we used, you can choose from six other palettes, shown above from left to right, top to bottom…
- Driftwood Gray + Heirloom White
- Walking Stick + Red Pine
- Winter Grass + Light Cerulean
- Driftwood Gray + True Turquoise
- Winter Grass + Mustard Seed
- Driftwood Gray + Green Spruce
You’ll also need…
- US 6 (4 mm), 32-, 40-, or 47-inch circular needles
- Spare US 5 (3.75 mm) or smaller, 32-, 40-, or 47-inch circular needles
Gauge
21 stitches and 30 rows = 4 inches in double knit stockinette stitch, using the larger needles
Sizes
Crib (Throw)
- Finished Measurements: 28 x 38 (39½ x 50) inches
Sample: We knit the Crib size.
Notes
Slip Stitches
Slip all slipped stitches purlwise unless indicated in the pattern.
Changing Colors
When changing colors, carry the new yarn up the selvedge in back of the old yarn.
Turn and Slide
Each row in this pattern starts with the instructions to either “Turn” or “Slide” the work:
“Turning the work” means to do what you would normally do when knitting rows with circular needles: Transfer the needle from your left hand into your right and the needle from your right hand into your left, and flip the work around so the opposite side is facing you.
“Sliding the work” means to keep the same side of the work facing you and to push all the stitches to the right end of the circular needles. Without turning the work, start the new row as you normally would.
You will know that you’re doing this right if the yarn you need to work the next row is magically there waiting for you!
Stitch Multiple
To adjust the width of the project, cast on a multiple of 10 + 7 stitches, then double it.
Double Knitting
This blanket uses a technique called Double Knitting. You can follow the pattern as written, but if you need extra help, our step-by-step video tutorial shows you how to do it! (Please note that Rows 1 and 2 in the video are the Set-Up Rows in our Double Knit Blanket pattern, below.)
Pattern
Cast On + Set Up
NOTE: For our version of this blanket, we used a Long Tail Tubular Cast On (and omitted the foundation rows). You should know that this cast on is quite a bit more complicated than a Long Tail Cast On, so if you go down the Tubular path and get frustrated, just use a Long Tail Cast On… It’ll look beautiful, we promise!
With Yarn A and the smaller needles if working a Long Tail Cast On and the larger needles if doing a Tubular one, cast on 294 (414) stitches.
NOTE: If using a Long Tail Cast On on smaller needles, switch to larger needles.
Set-Up Row 1 (wrong side): Turn work (see Notes) and with Yarn A,*k1, slip 1 with yarn in front (wyif), repeat from * to end of row.
Set-Up Row 2 (right side): Turn work and with Yarn B, *k1, slip 1 wyif, repeat from * to end of row.
Begin Double Knitting
Row 1 (right side): Slide work (see Notes) and with Yarn A, *slip 1 with yarn in back (wyib), p1, repeat from * to end of row.
Row 2 (wrong side): Turn work and with Yarn B, *slip 1 wyib, p1, repeat from * to end of row.
Row 3 (wrong side): Slide work and with Yarn A, *k1, slip 1 wyif, repeat from * to end of row.
Row 4 (right side): Turn work and with Yarn B, *k1, slip 1 wyif, repeat from * to end of row.
Repeat Rows 1-4 for a total of 1 inch, ending with Row 4.
Tack Down
Row 1 (right side): Slide work and with Yarn A, [slip 1 wyib, p1] 3 times, *slip 1 wyif, p1, [slip 1 wyib, p1] 9 times, repeat from * to last 8 stitches, slip 1 wyif, p1, [slip 1 wyib, p1] 3 times.
Row 2 (wrong side): Turn work and with Yarn B, [slip 1 wyib, p1] 3 times, *slip 1 wyif, p1, [slip 1 wyib, p1] 9 times, repeat from * to last 8 stitches, slip 1 wyif, p1, [slip 1 wyib, p1] 3 times.
Row 3 (wrong side): Slide work and with Yarn A, *k1, slip 1 wyif, repeat from * to end of row.
Row 4 (right side): Turn work and with Yarn B, *k1, slip 1 wyif, repeat from * to end of row.
Continue Double Knitting
Repeat Rows 1-4 of Begin Double Knitting section until piece measures 1 inch from the previous tack down row, ending with Row 4.
Stagger Tack Down
Row 1 (right side): Slide work and with Yarn A, [slip 1 wyib, p1] 8 times, *slip 1 wyif, p1, [slip 1 wyib, p1] 9 times, repeat from * to last 18 stitches, slip 1 wyif, p1, [slip 1 wyib, p1] 8 times.
Row 2 (wrong side): Turn work and with Yarn B, [slip 1 wyib, p1] 8 times, *slip 1 wyif, p1, [slip 1 wyib, p1] 9 times, repeat from * to last 18 stitches, slip 1 wyif, p1, [slip 1 wyib, p1] 8 times.
Row 3 (wrong side): Slide work and with Yarn A, *k1, slip 1 wyif, repeat from * to end of row.
Row 4 (right side): Turn work and with Yarn B, *k1, slip 1 wyif, repeat from * to end of row.
Continue
Repeat from Row 1 of Begin Double Knitting section to Row 4 of Stagger Tack Down section until piece measures 37 (49) inches from cast-on edge, ending with Row 4 of Stagger Tack Down section.
Repeat Rows 1-4 of Begin Double Knitting section for 1 more inch, until piece measures 38 (50) inches from cast-on edge, ending with Row 4.
Cut Yarn B.
Bind Off
Set-Up Row 1 (right side): Slide work and with Yarn A, *k1, slip 1 wyif, repeat from * to end of row.
Set-Up Row 2 (wrong side): Turn work and with Yarn A, *k1, slip 1 wyif, repeat from * to end of row.
Alternating between needles, slip all the knit stitches onto the working circular needles and all the purl stitches onto spare circular needles.
FOR A LONG TAIL TUBULAR CAST ON…
Slide work and with right side facing you, use Yarn A to bind off in Kitchener Stitch.
IF YOU DID A LONG TAIL CAST ON…
With Yarn A and the right side facing you, bind off using a 3-Needle Bind Off.
Weave in the ends and block as desired!


Feeling really stupid. Please help. I am going to make this blanket for someone who’s 6’5” would like it to be at least 6 ft long and 42 inches wide. I can figure out the length but cant figure out the # stitches needed to cast on. Can you help? Thank you in advance. I’m using one of your newer color palettes.
Hi Elizabeth,
Thank you for your question! I would suggest casting on an extra 34 stitches in addition to the 414 stitches listed in the pattern for the throw size, making the new number of cast-on stitches 448. An extra 34 stitches in the cast-on will make your blanket around 3.2″ wider for a total of approximately 42.7″ for the width. This goes with the pattern’s instruction to cast on a multiple of 10 + 7 stitches and then doubling that number (doubling just means that half the stitches will go on the front of the blanket and half on the back!). Since the gauge listed in the pattern is 5.25 stitches per inch, extra 17 stitches on the front and 17 on the back means an overall 3.2″ increase to the width.
I hope this was helpful! Thanks again for commenting and have a wonderful rest of your day!
All the best,
Cat
Thank you thank you specially for the additional explanations. You’re a gem Catherine Yang.
Elizabeth
I heard that if you double knit you should take two needles smaller than your wool. Is this correct?
Is the tacking down stitch so that the blanket doesn’t pull apart, so to speak? I know the sides will be shut but if i dont do the tacking downis his what will occur?
Hi Rachel,
Thanks for reaching out! For this pattern, we used two different sport weight yarns and we recommend using a US 6 (4 mm) needle. And yes that is correct, tacking down the stitches keeps the blanket nice and flat, otherwise, the blanket would pull apart thought out the center.
I hope this clears things up!
Gianna
I’m sorry if this has already been asked and answered, but do you have a recommendation for a yarn to replace the mulberry merino? I made this blanket before my daughter was born – she’s two now and absolutely loves it. Would like to make a second for my next child. Thanks!
Hi Becca,
Thanks for writing in! I would suggest using our lovely Season Alpaca in place of Mulberry Merino, it is a perfect gauge match and works great with Good Wool!
I hope this helps, happy knitting!
Gianna
Hi, But you don’t have it in orange or a similar color to the Persimon Orange right? How close is the Barn Door Good Wool to the Merino Persimon Orange? Would you say is a good replacement for the Merino? Thanks!
Hi Ana,
Good Wool in Barn Door is definitely a good match for Mulberry Merino in Persimmon Orange! Both are sport weight yarns, and the other color of the blanket is already in Good Wool, so it will definitely work!
All the best,
Lili
Would a baby blanket with Santolina yarn do well? 3 skeins each of 2 colors? Do you recommend a needle size?
Hi Dorian,
Thanks for reaching out. This pattern would work great in Santolina! We recommend sizes US 2 or 3 with this yarn. However, I’m afraid it’s difficult for me to predict how many skeins of each color you’ll need, since I don’t know how large you’re planning on making this blanket. Can you let me know what dimensions you’re planning on knitting it to? Then I can absolutely let you know have many skeins you’ll need!
All the best,
Lili
Hi there,
I am thinking of using the Santolina yarn to make a baby blanket. I thought the cotton/bamboo/hemp blend would be soft and drapey. Will the double sided pattern be too thick with this yarn? What size needle do you recommend for your 28×38 crib size? Thanks for any advice you have.
Hi Dorian,
Sorry, I didn’t see that you had written another comment before replying to the first one! Santolina is indeed very soft and drapey, but I don’t think the blanket will be too thick at all–just very cozy. Thank you for providing dimensions. I’d recommend purchasing 4 skeins of each color!
All the best,
Lili
I can’t see how your 294 is minus 7 and divisble by ten then doubled to make 414.
I wanted less sts as i have thick wool. So i thought 77 minus 7 leaves me 70 which is divisible by 10 then doubling it should give me 154. But looking at your equation and mine i must be doing something wrong.
Also, if i do a thicker blanket should i start the tacking sooner than 1“ or later?
Hi Rachael,
Thanks for writing in! The cast-on of 294 stitches is for the Crib size of this blanket, while the cast-on of 414 is for the Throw size. Those two numbers aren’t related to each other!
154 stitches will definitely work, in terms of the stitch multiple–you’re doing the equation correctly! If you want to be extra sure that you’re casting on the correct number for the weight of the yarn you’re using though, I’d recommend first making a gauge swatch in double knitting. Once you know how many stitches you are getting per inch, you can multiply that number by the width you’d like, round to the nearest multiple of 10 + 7, and then cast on double that number. Then you can follow the pattern as written! You can still work the tack-down rows every 1 inch, it will just take fewer rows to reach 1 inch with the thicker yarn.
Hope this helps you get started on this project!
All the best,
Lili
Really struggling with your long tail tubular cast on. Pattern states omitting foundation rows? Is that the same as set rows?
Would like to know when to begin double knitting after tubular? How many rows of tubular did you work before “begin double knitting”?
Also confusing is the tutorial for long tail tubular references 1 x 1 ribbing and nothing about double knitting😬
I love this blanket, I love the rounded end the tubular makes, just need more clarity on the steps.
Please help!!!!!!
Hi Joyce,
Thanks for writing in. While a long tail tubular cast on is indeed often used for 1×1 ribbing, it’s also a great option for starting a project in double knitting! The great thing about using this method of casting on for double knitting is that all you have to do is work the cast-on and then jump straight into the pattern (since you’re omitting the foundation rows). So after you cast on all of your stitches, you can move on to Set-Up Row 1 (wrong side) immediately. I hope this helps clarify things!
All the best,
Lili
You didn’t identify if set up is the same as foundation rows. And are you casting on both colors in the cast on? Please help. I love the blanket.
J.P. McCain
Hi J.P.
Thanks for writing in. The Set-Up Rows are different from the foundation rows! That’s why I mentioned that the pattern indicates to omit the foundation rows of the long tail tubular cast-on and continue straight to the Set-Up Rows. In answer to your other question, you will cast on with only Yarn A. Hope this helps clear things up!
All the best,
Lili
Hello!
I’m so excited to make this blanket but I find the long tail tubular cast on method impenetrable on circular needles 😐 I’m looking to make the throw size at 414 stitches but I have a hard time interpreting the twisting of the cast on stitches once I’m supposed to work row 1 (forget about casting on to a larger needle and transferring the cast on stitches to the working needles…)
Any tips on how to handle this? Should I just get one super long straight needle to cast on? Or is there some magic involved that I’m missing 😶
Thank you so much in advance!
Jennifer
Ps –I already tried the waste yarn method but I hate the look of reducing that one extra stitch.
Hi Jennifer,
Thanks for writing in! Long Tail Tubular Cast on can be quite the challenge, especially when casting on such a large number of stitches like with this blanket. The easiest option would be to work a basic Long Tain Cast On instead of the tubular! If you are set on trying the tubular cast on, then I would suggest trying it out on a straight needle and seeing if that makes the process easier. Also, feel free to email us directly at customerservice@purlsoho.com and we can always help you further from there.
I hope this helps, happy knitting!
Gianna
I can’t wait to start this but please clear this up first. When do I attach color B? Looks like cast on and row 1 are in yarn A and yarn B is introduced on row 2. Is that correct?
Thanks
Hi Mimi,
Thanks for reaching out. You will start knitting with Yarn B on Set-Up Row 2! Hope this helps clarify things.
All the best,
Lili
Are you familiar with the tubular cast on method on very pink.com? She begins with a provisional cast on and 1/2 the stitches….if so would it work here?
Hi Mimi,
I’m afraid I’m not familiar with that version of the tubular cast-on, but I think you could absolutely try it out! I’d recommend working up a small swatch to test if it works.
All the best,
Lili
Hi – two questions re: the tubular long tail cast on – in the written instructions for set-up row 1, it says to K1, wif slip one. But in the video it says to knit through the BACK of the stitches. Also in the written instructions, it says to omit the foundation rows – are these the two set-up rows? Not sure, as in one of the comments (March 2, 2022), it says to go straight into the set-up rows. So do we do the set-up rows for the tubular cast-on, or not? Thanks!
Hi Carmella!
Thank you for your questions! After casting on with a tubular cast on, you can jump right into the set-up rows, which include all the steps for transitioning between the cast on edge and the body of the blanket. I suggest following the “K1, slip one wyif” instructions of the set up rows in this blanket, as they are the pattern-specific instructions for this design. If you would prefer to use a long-tail cast on for this blanket, you are welcome to do that, too!
I hope this helps!
All the best,
Margaret
Hi Margaret – thanks for this. In the video it says to knit in the BACK of the stitches for the K1, in the set-up rows. In the written instructions above, it simply says K1. So which is it?
Hi Carmella!
The video tutorial for the tubular cast-on says to knit in the back of the stitches for the foundation rows, but since you will be following the Double Knit Blanket set-up row instructions, you can knit these stitches normally, and not through the back loop.
Happy knitting!
All the best,
Margaret
Hello, what a great looking blanket and maybe I’ll try it with a scarf size first as some aspects are new to me. So if I start with the tubular cast on, the video shows alternating Purl and Knit style cast on stitches. With this blanket/scarf do we just do all K cast ons?
Hi Ina,
Thanks for writing in! The long tail tubular cast-on technique relies on the alternating knit and purl cast-on stitches, so if you want to use that style of cast-on, then you will need to follow the instructions in the video. This is the same method we used for this blanket pattern! If you’d like to do a cast-on that only incorporates knit stitches, then I’d recommend beginning with the regular long tail cast-on instead.
All the best,
Lili
If I omit tubular cast on, I will presumably be doing the foundation rows after long tail cast on. And perhaps these foundation rows are done before the set up rows? But what are the foundation rows? I read in comments that they are not the set up rows, so is the following the process:
1. long tail cast on
2. Foundation rows: what are they and how are they done?
3. Set up rows 1 and 2
4. Begin double knitting.
Kind Thanks, Cate M
Hi Cate,
Thanks for reaching out. If you decide to do the regular long tail cast-on, then there are no foundation rows at all! The foundation rows are something that you generally work when doing a tubular cast-on, but in this project, you omit them. So no matter which type of cast-on technique you choose, you will proceed straight to the Set-Up Rows after casting on your stitches. Hope this helps clarify things!
All the best,
Lili
Hi!
I knit a swatch of the pattern and for some reason it is open on both ends..this is my first try at double knitting. How do I close the sides? Did I miss something?
Hi Kathryn,
Thanks for reaching out. It sounds like you’re not carrying the new yarn up the selvedge when you switch colors! When changing colors, you’ll need t o carry the new yarn up the selvedge in back of the old yarn in order for the colors to be interlocked. Hope this helps clarify things!
All the best,
Lili
I am struggling with how to carry the colors up the edges so there is a fusion of the two layers. Can you help. I am liking pattern but have two separate layers please help. It says to carry in back but most end in slipped stitches so unsure how to do this.
Hi Paula,
Thanks for reaching out. You can actually still carry the yarn up in back of the other working yarn even if the row ends in a slipped stitch! It will just have to reach one stitch further in order to interlock with the other strand. I think the best way to make sure you’re closing up the edges is to take a moment at the end/beginning of each row just to double check that the yarns have crossed over each other. Once they’re securely interlocked, the sides of the blanket will stay put!
All the best,
Lili
Do the set up rows end in a slipped stitch or a knit stitch?
Hi Elaine,
Thanks for writing in! Both Set-Up Rows end with a slipped stitch.
All the best,
Lili
I’m having a hard time deciding what yarns to use here — would it work to use two colors of Cotton Pure or would that not be stretchy enough if used on both sides? Would one color of Good Wool and one color of Cotton Pure work best or would you recommend two colors of Santolina? Thanks so much!
Hi Jane,
Thanks for your comment! Cotton Pure and Good Wool are both sport weight yarns and match well in terms of gauge, so either would work great for this pattern! Cotton Pure would make for a wonderful blanket that’s machine washable too if you make the entire project in this yarn. The stockinette fabric would provide plenty of stretch. You could certainly do one side in Good Wool and one side in Cotton Pure as well, that would be really cool! I recommend making sure that you’re getting gauge with both of these yarns to ensure both sides of your blanket match up. Here’s our guide on swatching in case you’re interested in more info on that (https://www.purlsoho.com/create/2020/08/20/all-about-gauge/)! Lastly, I wouldn’t recommend Santolina for this project because it’s a fingering weight yarn and would be a bit too thin.
I hope this helps!
All the best,
Cat
Thanks so much, Cat!
Which combination of yarns would work best here– Good Wool + Cotton Pure, 2 Santolina, or 2 Cotton Pure? Thanks!
Hi Jane,
I think Good Wool and Cotton Pure or all Cotton Pure would be perfect for this blanket! If you combine Good Wool and Cotton Pure, I just wanted to mention that that will make the blanket hand wash only. Santolina is a bit too thin since it’s a fingering weight yarn and the pattern calls for a sport weight, so it wouldn’t quite work for this blanket. Let us know if we can help with any other questions!
All the best,
Cat
Hi. I made this for my grandson and my daughter loves it and so wants another one for another baby. Would you also recommend doing this blanket in all Good Wool with two colors? Thanks.
Hi Robin,
You can absolutely make this blanket in two colors of Good Wool! You won’t get the textural difference present in the original version, but it will work, technically. If you’re interested in finding a second type of yarn that has a different texture though, you can use a different sportweight yarn. In particular, I’d recommend Season Alpaca, which feels a lot more “smooth and silky” than Good Wool!
All the best,
Lili
Thank you!
I am struggling with the, wrong side right side. Sometimes right side is color B, sometimes it is color A. Can you help a little
Thanks!
Hi Susan,
Thanks for writing in! I would suggest adding a removable stitch marker onto one side of your work to help you better identify your right side versus the wrong side when knitting. This can also help you identify what row you are on as you knit along.
I hope this helps but please let me know if you need further assistance!
Happy knitting,
Gavriella
On set up rows, A is wrong side and B is right side. so I put the marker on the right side color B. In the Double knit Row 1 says with A on right side, row 2 is B on wrong side.
Ah, thanks for helping me better understand your question. When knitting your setup rows for your blanket, you will turn each time to prepare for double knitting. Once you move to row 1 in the Begin Double Knitting section, you will start by sliding your work to be able to knit the same side.
Once you get a few inches into the pattern you notice that yarn B is the color that will show up on the right side. This happens when knitting and slipping stitches on the right side instead of slipping and purling. Ultimately you are working both colors on each pass but only one will show up depending on if you are on the right or wrong side. I hope this helps!
All the best,
Gavriella
Oh dear, I started the crib size blanket and managed to do the tubular cast on but as I was finishing the first row I dropped the second to last cast on stitch. I can’t figure out how to pick it back up and I can’t find an answer for this online. Any suggestions? Thanks!!
Hi TK,
Thanks for your question! One thing you could do is use a crochet hook to pick up the dropped stitch and place it back onto your needle. You can follow these steps to pick up that stitch.
1. Knit up to the column of stitches that contains the mistake and let that column unravel until you just pass the stitch with the mistake.
2. Insert a crochet hook into the bottom-most loop.
3. Slip the hook under the “bar” just above this loop.
4. Pull the bar through the loop, creating a new loop.
5. Slip this final loop back onto the left needle.
I hope this helps but please let me know if you have any more questions!
All the best,
Gavriella
Hello! I want to make this beautiful throw about 40×60 in. I understand I have to add 34 stitches to make it a little wider but can you tell me how many skeins of each color I will need? Just want to be sure I will not run short.
Thank you!
Hi Ghislaine,
Thanks for writing in! To complete this blanket in a 40 x 60 size, you will need 2180 yards of color A and 2160 yards of color B. I hope this helps!
Happy knitting,
Gavriella
Thank you Gavriella for your help.
Do you think this would work in Wigeon (carmine orange or yellow curry) & Morning (grassland grey)?
Hi Eva,
Thanks for writing in! Although those colors are all so beautiful, I would recommend sticking with the same fiber content throughout the pattern as these fibers will block and stretch at different rates. Wigeon in Eucalyptus Gray would make a great pairing with the Carmine Orange or Yellow Curry! I hope this helps!
Happy making,
Gavriella
Actually, if i wanted to work this in cotton pure (tomato orange) and morning (grasslands grey) to match the sample color way (ish) in washable yarns would you recommend downsizing to 5’s or sticking with 6’s? Increase stitch count by 20-40 to keep the sizing consistent?
Hi Eva,
We would recommend starting with a gauge swatch using the size needle indicated in the pattern. If you are able to get gauge of 21 stitches and 30 rows and like the fabric, then you can follow the pattern as is! If you would like to adjust your gauge, you can calculate your cast on number by measuring your preferred gauge swatch to get the stitches per inch by the desired width of the pattern. I hope this helps but please let us know if you have any other questions!
Happy knitting,
Gavriella
Thanks!!
I am working on the larger size of 414 stitches. But the instructions aren’t complete for the larger size, and I cannot get it to work with the tack downs as is.
Please help.
Hi Esther,
Thank you for writing in! Could you please let me know the issue you are having with the pattern? The instructions for both the small and larger size are the same outside of the number you are to cast on so I just want to make sure we can give you accurate advice on how to proceed. Would you mind sending a photo of your project to customerservice@purlsoho.com? This could help us better visualize the issue you are having.
I will keep an eye out for your reply.
All the best,
Gavriella